
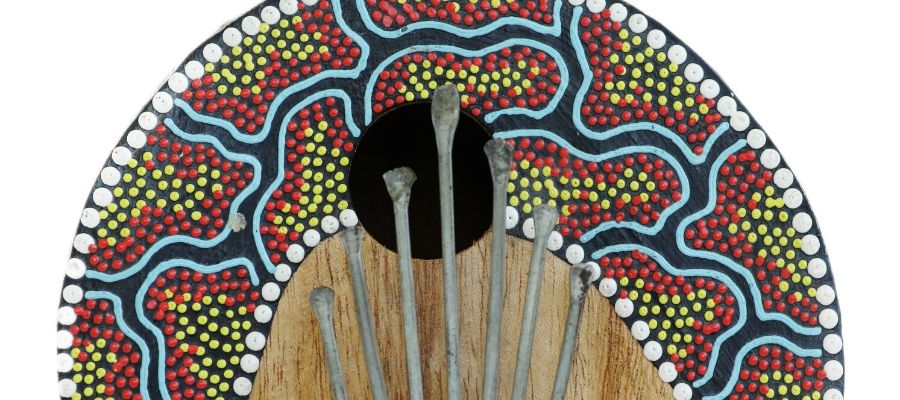
You might have already bought your first kalimba, or you’re planning to get one. Regardless of the answer, you probably noticed how some tines are different colors, or that you have stickers on kalimba keys.
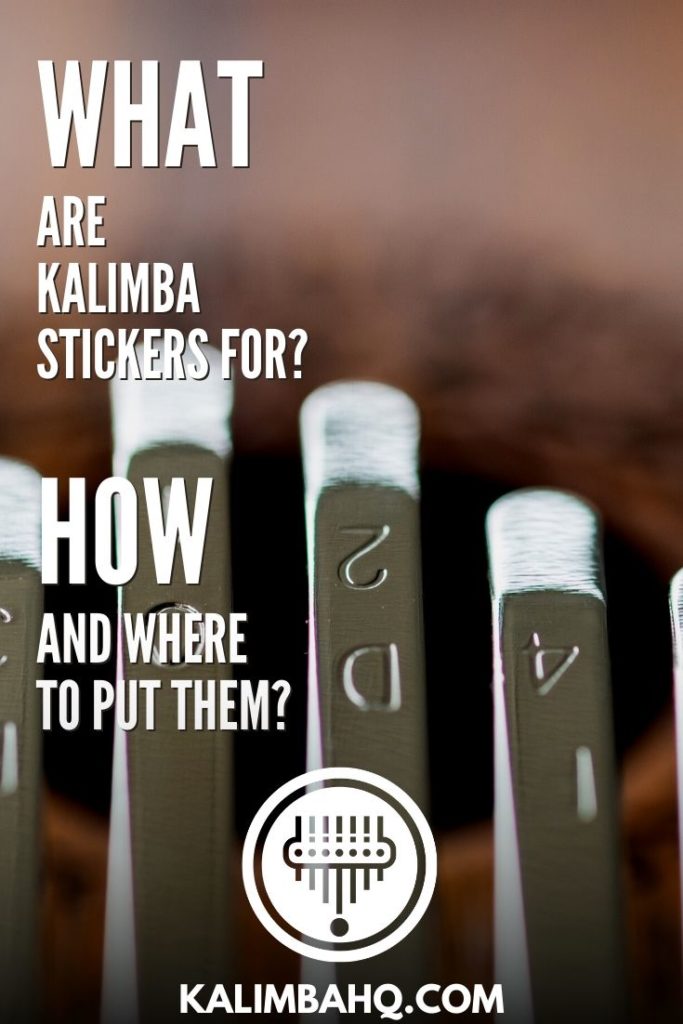
But what are kalimba stickers for? The goal of these stickers is to help you navigate the keys, and ensure that you always know what you’re doing and which notes you’re playing. This is especially important if you are a beginner and if your thumb piano has 17 keys.
There are several additional reasons why you might paint tines, and different layouts based on tuning as well.
What Are Kalimba Stickers For?
Most kalimbas today come in a package with additional equipment and accessories. One of the common items you might find in the box is stickers. These stickers are here to help you navigate keys.
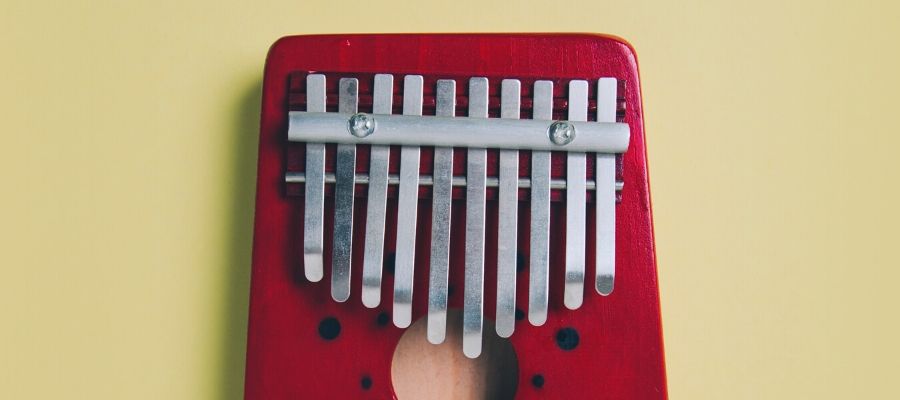
If you take a look at Gecko kalimba, which is one of the best instruments for both beginners and experienced players, you will get a set of stickers when you order it.

There are two types of stickers available for kalimba, and you can use one of them or even both at the same time. There are no rules to which ones are right and which you should pick, so you can use everything if you feel like it.
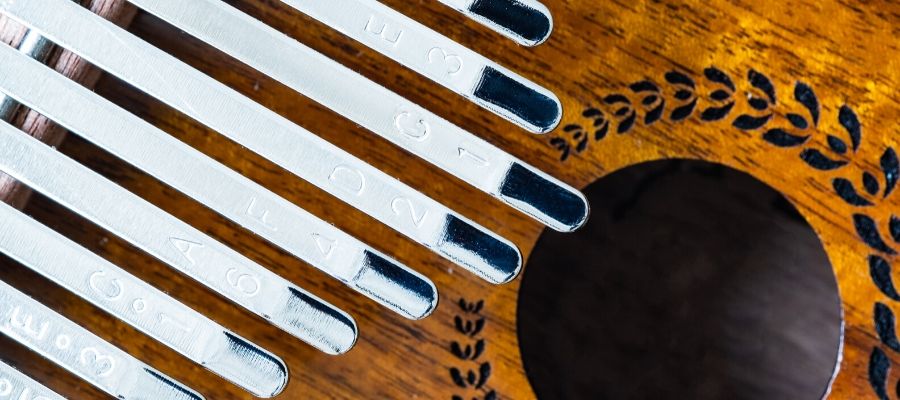
The first type of stickers is for intonation, and since most kalimbas are in the key of C major, the stickers will be as well. The idea is to use each sticker and place them on the tines to make navigation and playing easier.
If you do this, you’ll be able to find a C note in no time since there will be a sticker placed on top of each individual tine.
Another thing you might notice is that there are number stickers as well. You can use them together with letter stickers and in that way, the C note will have number one, or number one with one or two dots. Dots serve to show which octave you’re in, and since you are playing seventeen note kalimba, there will be three C notes.
Purpose of Painted Tines
When Hugh Tracey started making kalimbas in the early fifties, every third tine was painted. This means that there were five colored keys on each instrument.
The original Hugh Tracey kalimba was in the key of G major, and the lowest note on the instrument was B. This means that the first note or the longest tine is the B.
Today, most kalimbas are in the key of C major, and while they might look similar to Hugh Tracey ones, they are quite different.
In the modern ones, the root note is also the lowest one, which means that if you alternate left and right from starting from the longest tine, you will play the C major scale.
With Gecko kalimbas like the one linked earlier, you will get stickers to help you paint the tines. You will be able to choose between red and green stickers, and they will significantly help you learn the instrument.
How Do You Put Kalimba Stickers On?

When it comes to the process of putting the stickers on, you won’t have any trouble. It is as simple as using any other sticker, and all you need to do is make sure that you put them in the right place.
Since stickers are placed on the middle and upper part of the tine, you won’t need to worry about wearing them out during play. Your fingers and fingernails will pluck the tine at the bottom, and your fingers won’t get near these stickers, which means that you won’t need to worry about removing or damaging them by accident.
So, if you have a kalimba like the Gecko one in the key of C, you will start with the longest tine, and mark it as 1 or C (or both). After that, the first note on the left is number 2 or D. The first one on the right from C is E or number 3.
You will then proceed to put stickers on the fourth and fifth, which are second from C on the left and right respectively. Proceed following the same pattern until you place all seventeen numbers and keys.
This picture can help you along the way, but remember that this applies to C kalimbas only, and if you have a different tuning, you should make appropriate changes.
Putting stickers on is as easy as it gets. Once you peel the sticker, just place it on the middle of each tine, and run your thumb over it to make sure that you pushed the air from the sticker.
Where Do You Put Kalimba Stickers On?
The letters and number stickers can go anywhere you like. Usually, stickers with letters and numbers will go just above the place where you pluck tines, and all you need to do is make sure that they aren’t too low to avoid touching them and wearing them out while you play the instrument.
Colored stickers should be placed above the letters and they go from the place that holds the tines, all the way to the letter stickers. You can use red ones, green ones, or a combination of both.
Whatever you decide, you will need only five or six stickers, and you shouldn’t use all of them to paint all tines since that would defy the whole purpose of stickers.
If you ever saw a guitar, you know that there are little dots on frets, and stickers have the same purpose. Their goal is to help you navigate and know your place around the tines.
Hugh Tracey Layout
The first option you might take is the original Hugh Tracey one. Here, he used five colors only. As previously mentioned, the kalimba was in the key of G, and the longest tine or the lowest note was B.
These thumb pianos have the B note painted. The second painted tine is third on the right or the root note. These kalimbas have every third note painted, and it allows you to easily find the root and the lowest note in the scale.
Even though modern kalimbas are usually in the key of C, you can still use this method to paint your tines. In the key of C, you will still paint the lowest note, but this time, it is also root or C.
After that, place the sticker on every third note, until you have placed all five stickers. In the C major, painted tines are C, A, B, G, and A. On the G major one notes are B, G, A, F#, and G.
You can use five stickers regardless of the key your instrument is in, and the only thing you need to remember is to start from the longest tine, and place a sticker on every third tine from there.
Modern Layout

Recently, many players started using a six-tine scheme instead of five. While the instruments might be the same, the layout is different.
Here, you will have three stickers on each side of the kalimba, and it is rather common for ktabs.
To avoid confusion between Hugh Tracey’s kalimba in the key of G, and modern ones in the C major, you can use six stickers instead. As I mentioned already, the longest tine on the C kalimba is the root.
However, this time, you will put stickers around it. This means that you won’t paint the root, but place a sticker on both the second and third tine instead. Your stickers will go on D and E notes, and after that, you will follow the three-note rule.
As a result, you will use six stickers instead. The painted notes in this method are D, E, C, D, B, E. Or if you want to look at it the other way, D, C, and B on the left side, and E, D, C on the right one.
The main quality of this method is that it allows you to play with people who have a different type of kalimba. For example, if you use a six-sticker method with Alto kalimba in G, you can look at people using Hugh Tracey kalimba in G and play the same notes.
Alternatives To Kalimba Stickers
If you already have a kalimba, and it arrived without stickers, you might want to seek an alternative. While stickers are, without a doubt, the best option for marking the tines, there are a couple of things you can do at your home to avoid buying anything else.
The first and most obvious thing to try is to create your own stickers. All you’ll need is paper or and you can use any color you like.
You can follow one of the layouts I mentioned, and this will make it easier for you to navigate the notes. You can use the same self-adhesive paper to mark the notes as well.
If you don’t want something like this, another option is to simply use a sharpie to mark the letters on each tine. One of the best things you can add to this is to draw a dot on each note that would otherwise have a sticker (or every third). This way, you can make everything easier, and you will have each note marked without hustle or a mess.
Summary
Ever since Hugh Tracey started making kalimbas, there have been tines with a different color. The main idea behind colored tines is to allow you to easily navigate through the notes and to find the next one you need without a hustle.
Since notes on kalimba alternate from left to right, it can be difficult for beginners to find the one they need.
Most kalimbas today arrive with stickers to mark the note, where you will get both the letter and the number of the note. Furthermore, you can also use colored stickers to create one of the two popular methods.
The first one uses five stickers, and it is based on Hugh Tracey’s kalimba from the fifties. The second one is newer, and you will need six stickers to mark every tine you want.
Regardless of the approach you pick, it will significantly help you improve your playing skills.
If you found this article useful you may want to save this pin below to your Kalimba board
Thank you for the excellent information. I am just starting my adventure with this instrument and the instruction is very helpful for me. Greetings from Poland. Giego eM.
I just bought a my first kalimba and at 75 I would expect my eyesight to need a little help so I’m looking at stickers or something to help. I got some with my gecko but they are unusable so I’m looking for a suggestion. I think little round ones would be good. Do they exist?
Thank you for this informative article. Now would you please make the decision on which one for me?